DIY Hideaway Shelf
Renter friendly projects and weekender DIYs are two of my favorite projects to take on and this project gave me both! Whether you’re renting a space or bought a house you want to customize without breaking the bank keep reading. We’ve all seen the unused towel rod in bathrooms normally placed right above the toilet. To this day I still have not figured out why builders think a towel should be hung above a toilet. Ewww. It becomes an unused space in your bathroom that has so much potential to become a place to showcase your decor and hold toiletries. This diy shelf goes over the towel rod covering it and creating a shelf for you to use! You can also watch me make it here.
This weekend diy project is perfect for anyone whos been wanting to try their hand at building and diying with tools. You will need..
a hand saw or circular saw
piece of wood wider then the widest part of your rod (I show you my drawing with measurements below)
wood glue
stain in the color of your choice
wood sealer
links to the ones I used: hand saw, wood glue, wood stain, poly sealer
You can get many types of wood for this project for me I wanted to only use on board for the whole project. I took measurements all around my towel rod. Each rod will likely be different in some way. When figuring out how wide i needed this board I knew it had to be wider than the widest part of the rod. My towel rod is slightly larger against the wall verses the actual rod so my piece of wood had to be wider than 2.5 inches. The thickness is up to you and the space you have to work with. For me a knew a regular 1x3x8 board would work. To figure out the 8 foot length I added my top, bottom, front and side pieces together while also leaving room for error just in case.

Once you’ve measured then measured again. Head over to your local home improvement store; I went to Lowes, and grab everything you need. Pro tip: if you look up the product you want to buy on Lowes website it will tell you what row and bay you can find it in! Once I was home I went back and remeasured everything again just to make sure I had it correct. It was time to start cutting. This shelf is a simple box with a front cover creating a floating shelf look. I designed my box so that as little raw edges would be seen as possible. To do that my top and bottom pieces were cut exactly to the length of my towel rod. Both side pieces were cut long enough to cover the rod and both the top and bottom pieces. Once my box was built and glued together I waited a couple hours for the glue to dry and harden before testing it over the towel rod.
I know it seems like over kill to keep measuring and dry fitting this shelf but it is much easier to fix things as you go then building the entire thing and in the end finding out something is wrong. Every project has something that doesn’t go to plan and for this one it was the fact that my shelf was falling forward. Remember how I mentioned the towel rod was larger against the wall than tapered almost like a triangle? Well because of that the front of my shelf had nothing to rest on. After some thinking I came up with the idea to cut a small piece of wood and glue it to the top piece of the shelf on the inside so that it would rest again the rod in the center making the shelf stay up and level.
Once that was fixed and my front piece was cut to cover the entire front of the box it was time for staining. I used Minwax red mahogany for this shelf with Minwax polycrylic as a sealer. You can also use a wood conditioner to help with an even stain. For staining less is more so dont saturate your wood or you will have to do a lot of wiping off and your wood will take forever to dry. Stain can be built up over time so start with a little bit of stain wait until it is dry and go over it again until you reach the desired color. For my stain I only had to go over it once and then left it over night to make sure all of the pieces were dry before sealing.
Since this shelf is in our bathroom plus its right next to the shower I was extra with the sealer and ended up doing 4 coats on all sides just to be sure moisture wouldn’t effect it. When the sealer was dry I glued the front piece to the box, adding another coat of sealer, before letting it dry for a couple of hours.
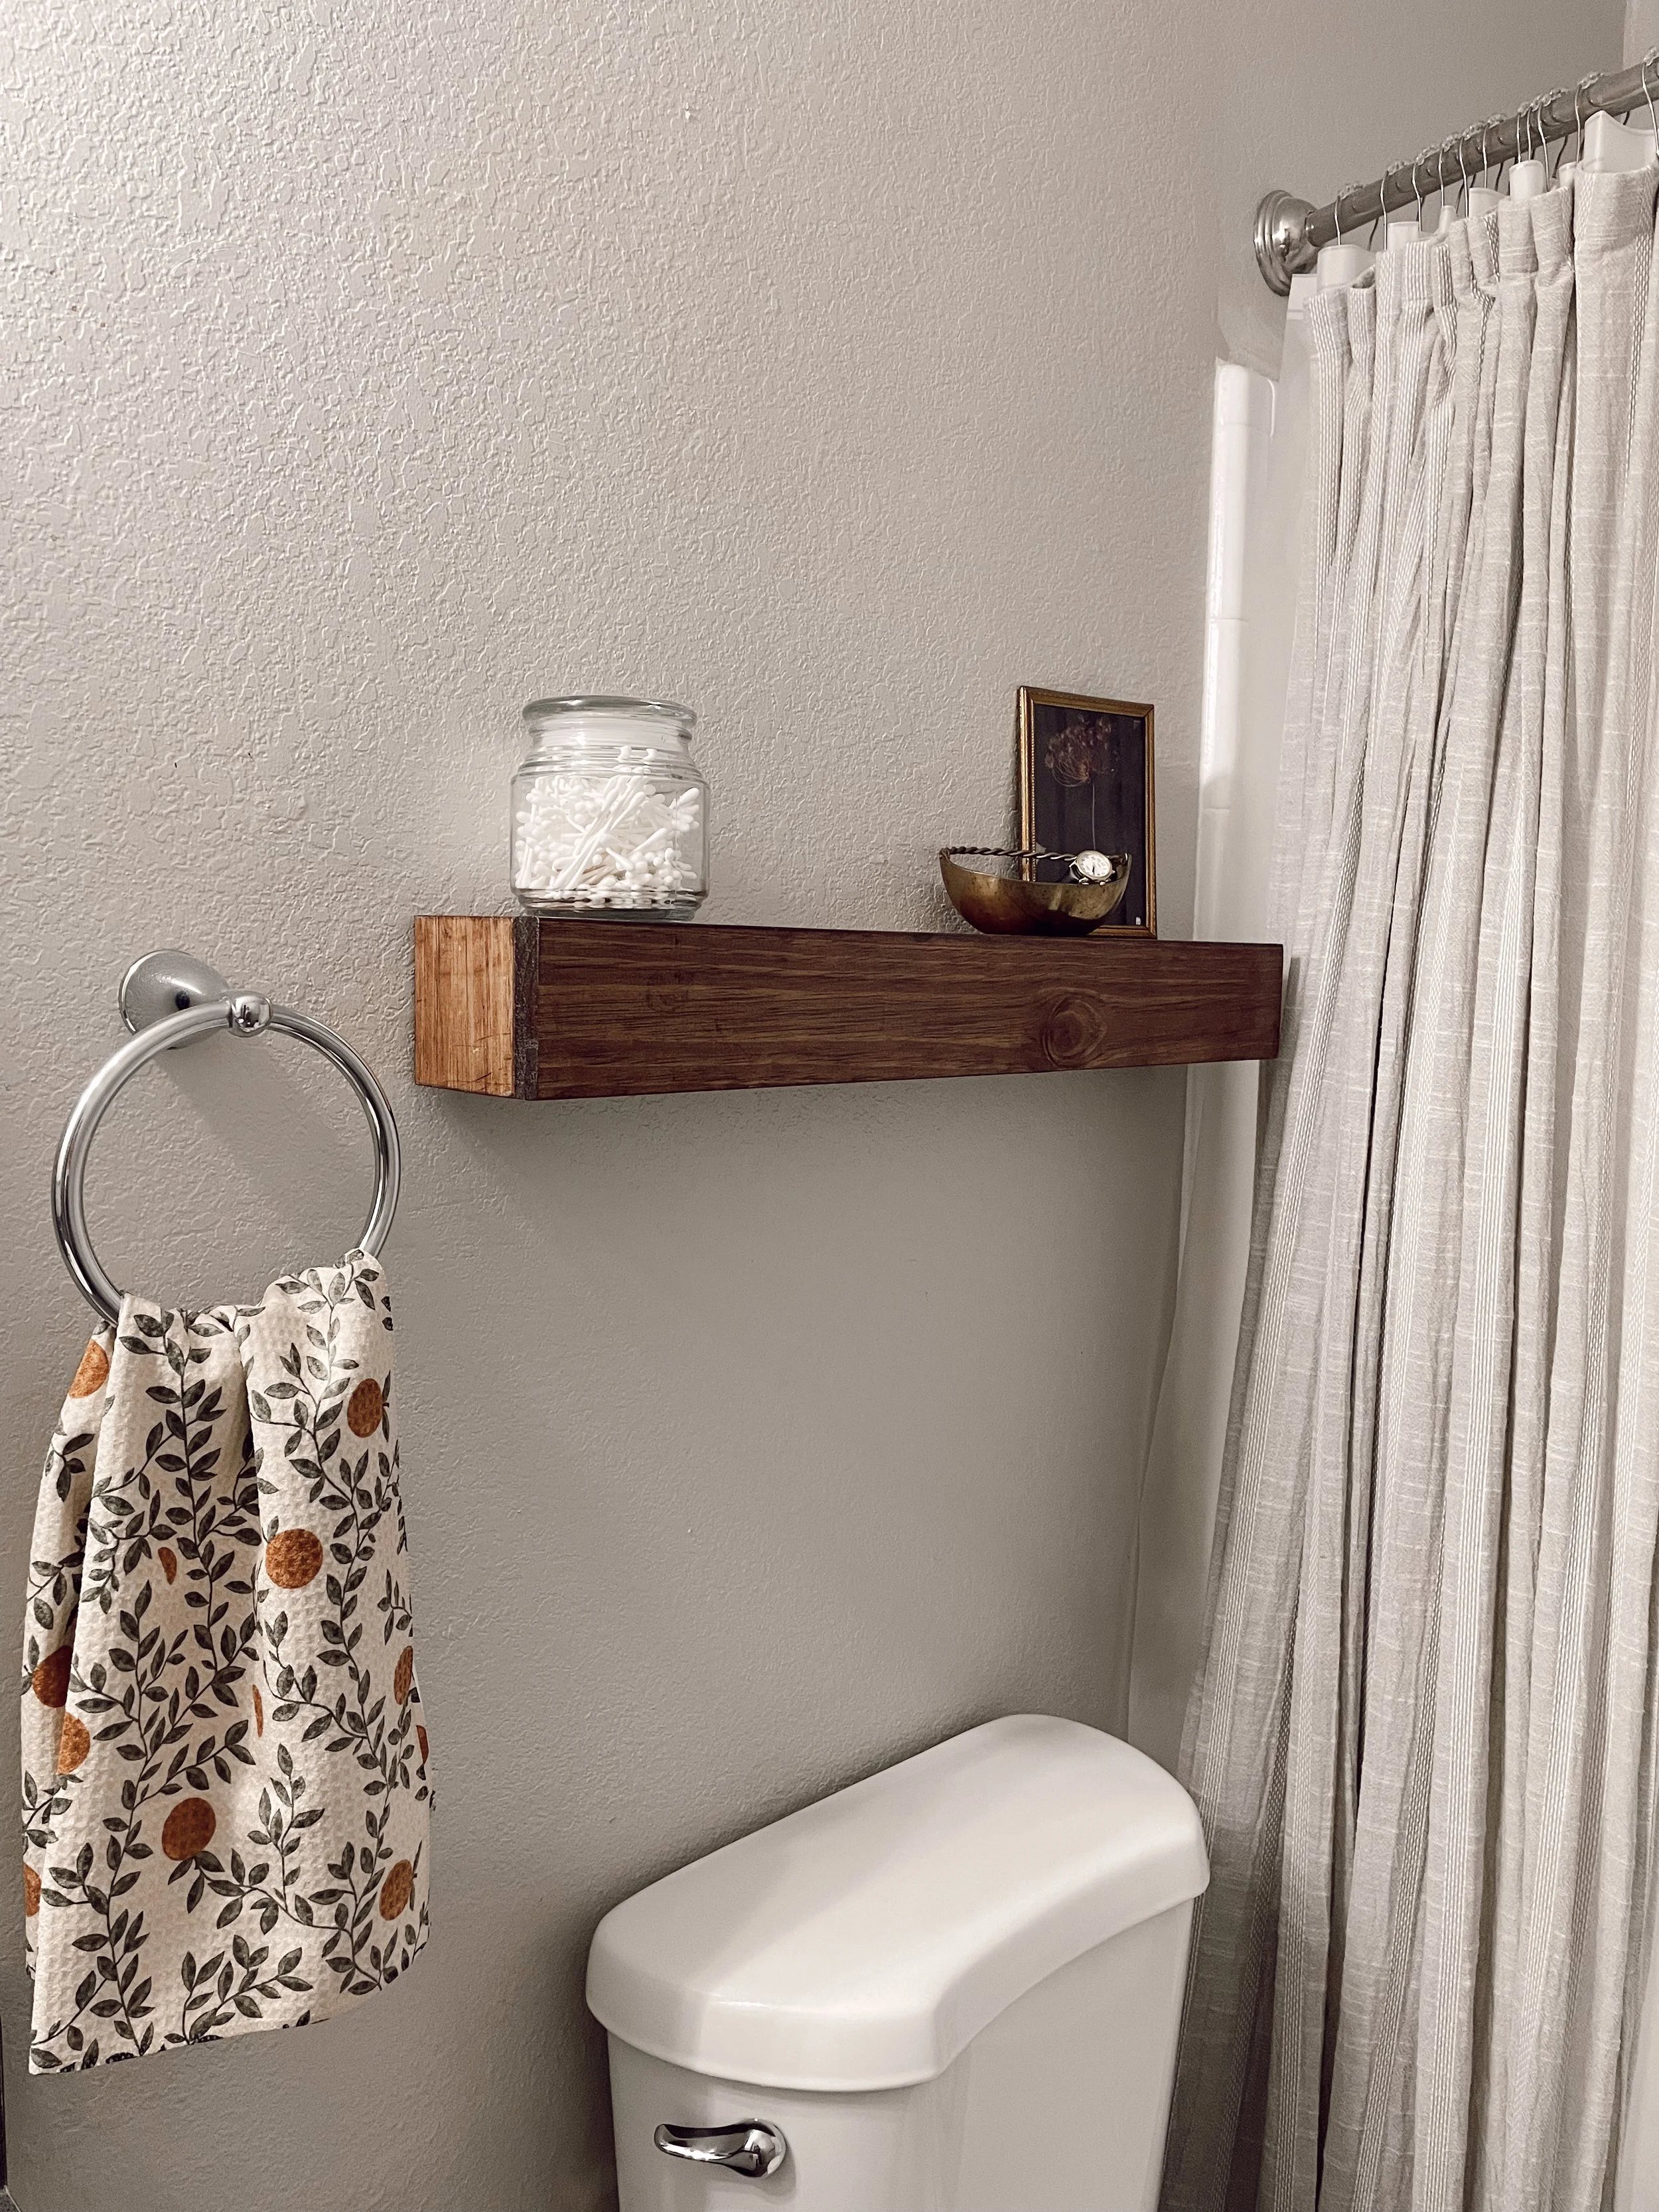
Final step is to hang your shelf and decorate! I love the way this shelf turned out not only for the warmth it gives our bathroom but also the added storage and renter friendly aspect of it. I added a brass bowl that holds my hair clip and watch as well as our cue-tip jar and a piece of art. I also added the Citrus tea towel from my fall home collection for extra warmth and function.
Let me know what you think of this DIY renter friendly shelf and/or if you decided to make it! You can tag me on social @joloudesign I’d love to see it.